
Not only does yoga help you find harmony and clear the mind of unnecessary thoughts, but it also helps strengthen the body. People who often do yoga can easily be mistaken for frequent visitors of the gym. For example, the actor, singer, and artist Jared Leto does yoga on a regular basis and he has already earned the title of a man who doesn’t age.
We have gathered some tips and asanas that will make your yoga workout more effective.
Preparation
To practice yoga, you need to prepare. Below is a list of things to keep in mind and to be ready for when you’re about to start your yoga session:
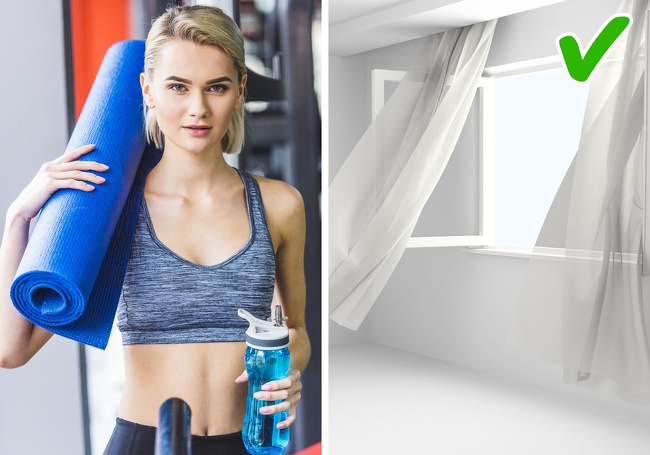
- It’s better to do yoga in a quiet and peaceful place and to avoid factors that could distract from the process.
- If a person is practicing indoors, then the room should be well-ventilated. Fresh airis a prerequisite for yoga, but it’s important to avoid drafts.
- Clothes should be free-fitting and should be made of natural fabrics that allow the skin to breathe.
- Before starting the workout, the stomach should not be full. You also need to drink a small amount of water and empty the bladder, and, if possible, the intestines.
- It is recommended to start classes about an hour after eating a light meal. However, it is better, if possible, to exercise on an empty stomach.
- During classes, it is recommended to put clean water next to you and to take sips from time to time in the intervals between poses.
- Eating immediately after class is strictly prohibited. It is necessary to wait at least 20 minutes to an hour before eating.
- The surface on which you will do yoga should be flat and firm so that when the solid parts of the body come into contact with the floor, there are no abrasions and bruises on them, the mat should be dense and thick enough, but not elastic and not soft. The dimensions of the mat should correspond to the size of the body so that the person fits on the mat when they’re stretched out on the floor. For practicing yoga, a rubber yoga mat is recommended.
Breathing
Correct breathing during yoga not only allows you to get the desired effect from the asanas, but it also helps you reach a special meditative state.
There are a few things to keep in mind:
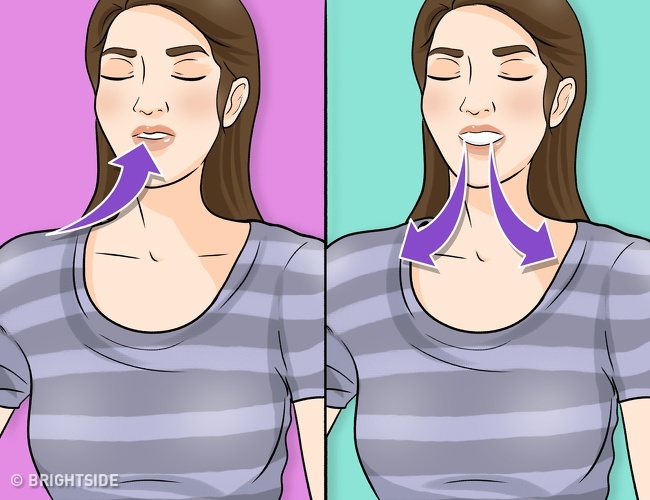
- Breathe only through the nose.
- Activate the diaphragm. The diaphragm is the muscle that separates the thoracic and abdominal cavities. When you inhale, it expands the volume of the lungs, and when you exhale, it returns to its original position. Diaphragmatic breathing isn’t always obtained the first time. A simple exercise can help. Lying on your back, bend your knees and put one hand on your stomach, the other on your chest. Breathe so that the arm on the chest remains motionless, and the hand on the stomach rises when you inhale and falls when you exhale.
- Breathe slowly and deeply.
- Maintain the rhythm. The transition from one asana to another is accompanied by a certain rhythm of breathing. The main rule: the movements directed upward (to raise the arms, to straighten the spine, to bend) are carried out on an inhale, and movements directed downward (to bend, to round the back) should be done on an exhale.
- When performing static asanas, breathing in yoga should not stop. Each exhalation is worth using to relax a bit more and to get deeper into the position.
Simple power yoga poses and asanas
1. Cat/cow
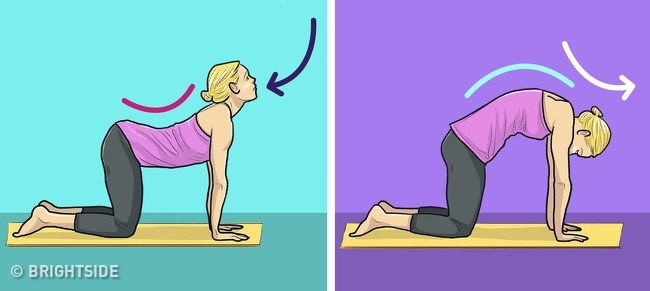
Technique:
- Stand on all fours. Place the palms strictly under the shoulders, and knees under the hips or together.
- The fingers of the hands should be slightly spread out so that the middle fingers look forward and the rest point slightly to the sides. The feet should be directed backward and the ankle should be on the floor so that no weight is placed on the toes.
- If your knees are not underneath the hip joints but together, then the thumbs should be crossed and the heels should be apart.
- As you inhale, bend your back down to the floor and stretch your head up, then push your head back, not “wringing” your neck, but pulling it up and back. As you exhale, tilt your head to your chest and bend your back up to form a “hump.”
- Your hands must always remain in an upright position. Straighten your body and rest on the floor.
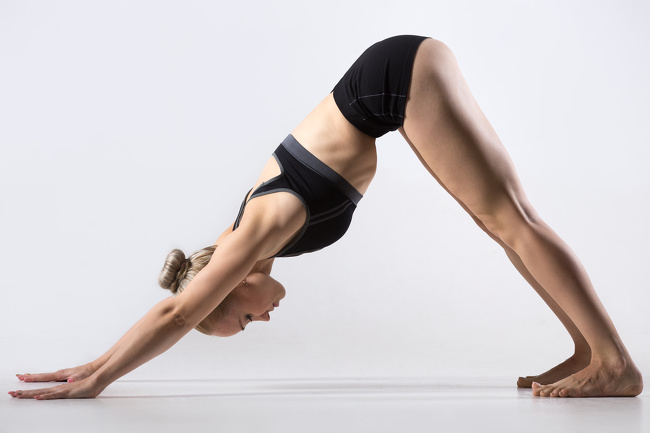
2. Downward-Facing Dog
Technique:
- Stand on all fours: your palms should be placed apart at the width of the shoulders with your fingers pointing forward. Your knees and feet should be placed apart at the width of the shoulders. Your hips and arms should be perpendicular to the floor.
- Bend the lower back. As you exhale, push your hands away from the floor, lift the buttocks backward and upward. Extend the arms and back in one line, seeking to increase the internal space in each joint.
- Straighten your knees and press your heels to the floor.
- Stay in this pose for one minute.
Features:
- Imagine that you formed a mountain with 2 slopes and a peak in the coccyx. Try to make the peak sharper and the slopes steeper.
- Push your hands against the floor the whole time.
- The palms should be pressed to the floor, the middle fingers should be elongated, and the rest should be spread out to the sides.
- The feet should be parallel and pressed to the floor. The toes should be stretched out.
- The legs should be straightened, the hips “wrapped” inward, the buttocks should “unfold” outward.
- The chest should be stretched to the hips.
- The loins should sag down.
- The coccyx should reach toward the sky.
- The abdomen should be elongated.
This pose is helpful when it comes to removing fatigue and returning lost energy. It is essentially useful for runners who need to rest after a race. The posture develops a feeling of lightness in the legs, promotes the softening of salt spurs, and relieves pain and stiffness in the heels. It also strengthens the ankles, forms a beautiful outline of the calf muscles, and helps relieve the pain of arthritis in the shoulder joints.
3. Revolved Triangle Pose
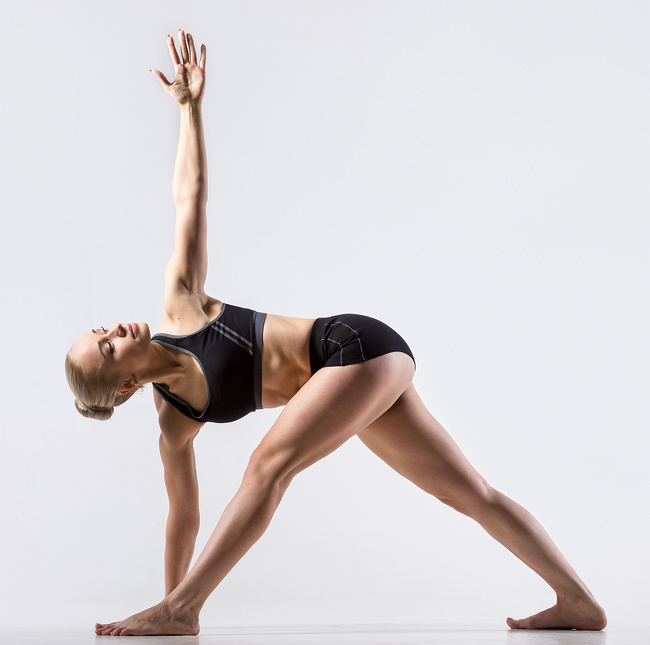
Technique:
- Spread your feet about one meter apart and stretch your arms out to the sides with your palms facing the floor.
- Expand the right foot completely to the right, the left foot — to 45° in the same direction.
- As you inhale, pull both sides upward, bend to the right as you exhale, placing your right hand on the floor at the outer edge of the foot or lift the foot.
- Extend the left hand upward, widening the thorax.
- All the while, lengthen the spine, stretch the neck, and fixate your sight on your left palm.
- Breathe for exactly 20-30 seconds. Then, as you inhale, rise and repeat in the other direction.
- Try to arrange the body in the same way.
This asana tones the muscles of the legs, developing the mobility of the pelvic joints, strengthens the knees, ankles, and opens the chest. It also promotes weight loss and eliminates any deformities of the legs. It also relieves pain in the back and neck.
4. Warrior I Pose
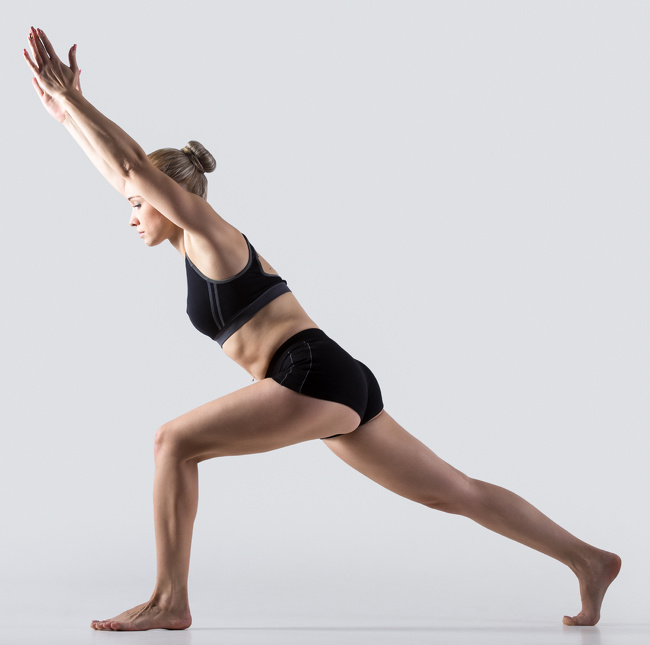
The pose of Warrior I strengthens the feet, hamstrings, quadriceps, and gluteal muscles, and it works your abdominal muscles.
Technique:
- Lift your hands up and stretch upward and connect your palms.
- Take a deep breath and place your feet at 120 cm to 130 cm apart.
- Exhale when turning to the right, turning the right foot 90° to the right, and turning the left foot slightly to the right. Bend the knee of the right leg in such a way that the femur becomes parallel to the floor, and the shin becomes perpendicular to the floor. The space from the calf to the thigh should make a right angle.
- Straining the muscles of the left knee, extend the leg.
- Stretch your spine and look at the connected palms. Hold this position for 20-30 seconds and breathe calmly.
5. Warrior II Pose
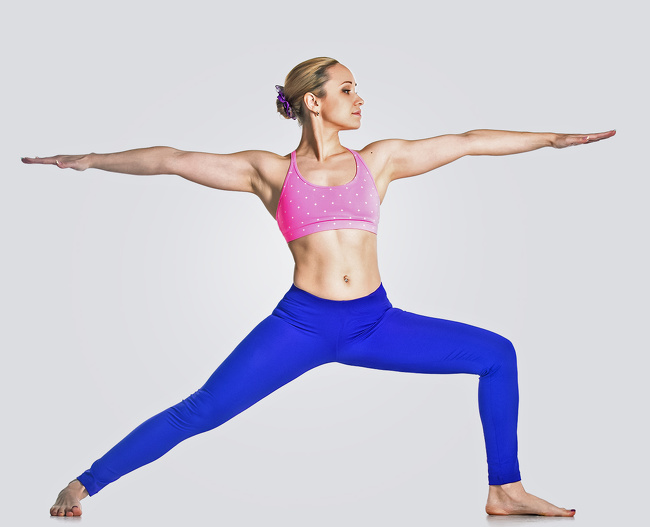
Technique:
- As you inhale, place your legs 120 cm to 130 cm apart and stretch your arms to the sides at shoulder level, keeping your palms down.
- Turn the right foot 90° to the right side, and turn the left foot slightly inwards. Keep your legs straight. Take a deep breath.
- Breathing out, bend the right leg at a 90° angle.
- Turn your head to the right; the left eye should look at the right palm.
- This is the final position. Breathe normally and stay in this position for 20-30 seconds.
Pay attention to the following points:
- Expand the chest.
- Stretch out both hands to the sides as if they are stretched in opposite directions.
- Keep the buttocks firm.
6. Warrior III Pose
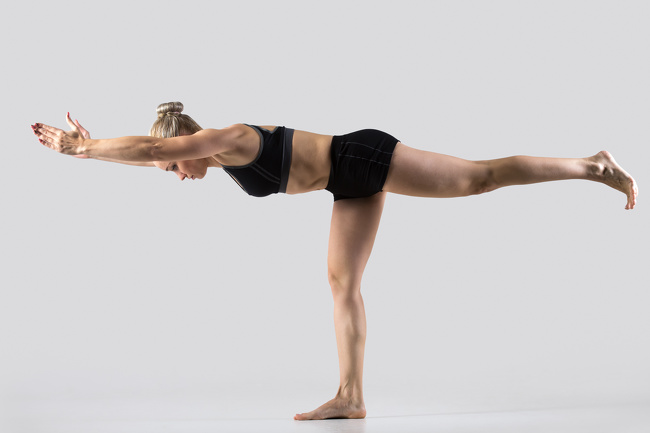
Technique:
- Inhale deeply and place your feel 120 cm to 130 cm apart. Raise your hands up to be on one line with your shoulders.
- Exhale, tilt the body forward, and lean your chest against the thigh of the right leg. Keep your hands straight and your palms together. Hold the position for a while.
- Exhale, lift the left leg, move the body slightly forward, straighten the other leg, and steadily lower it down.
- The left leg should be turned inward until its front surface is parallel to the floor. Stay in this position for 20 to 30 seconds and breathe calmly and deeply.
Note that the entire body, excluding the supporting leg, must be parallel to the floor.
7. Eagle Pose
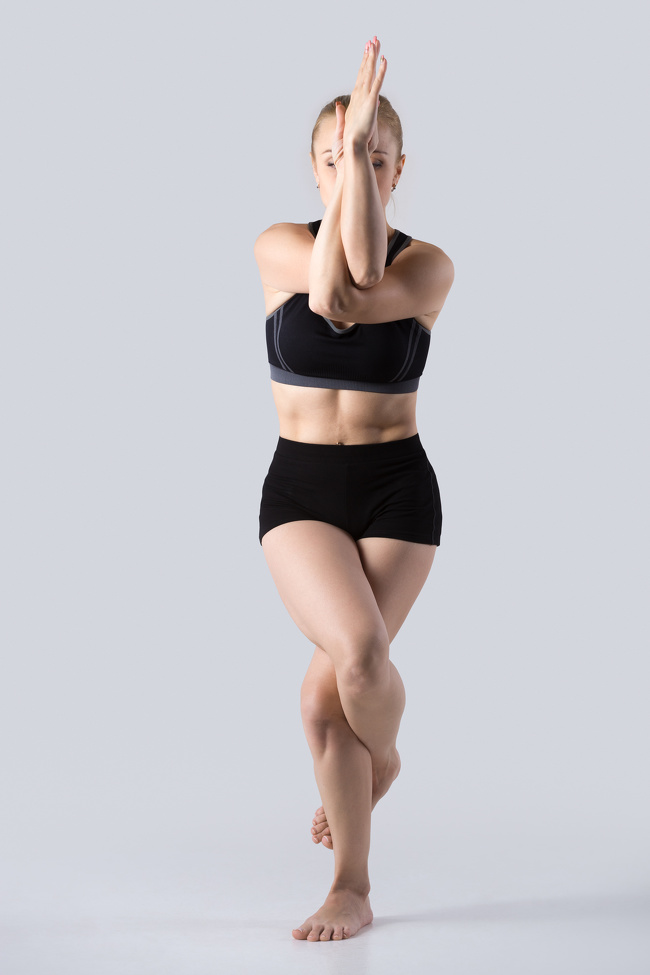
It’s necessary to keep a few things in mind when doing this pose. In order to maintain your balance, firmly press the supporting foot to the floor, lean more firmly on the big toe of the upper leg, and focus on any point in front of you. Stretch your back from the coccyx the crown.
Technique:
- Stand up straight. Raise the right leg, wrap it around the left, resting the big toe of the right foot on the left foot.
- Add the right hand to the left (the right humerus on top of the left one) and connect the palms with your fingers pointing up.
- Keeping the balance, lower the body as low as possible. Hold this position for 15-20 seconds (more if possible.) Breathe smoothly and deeply.